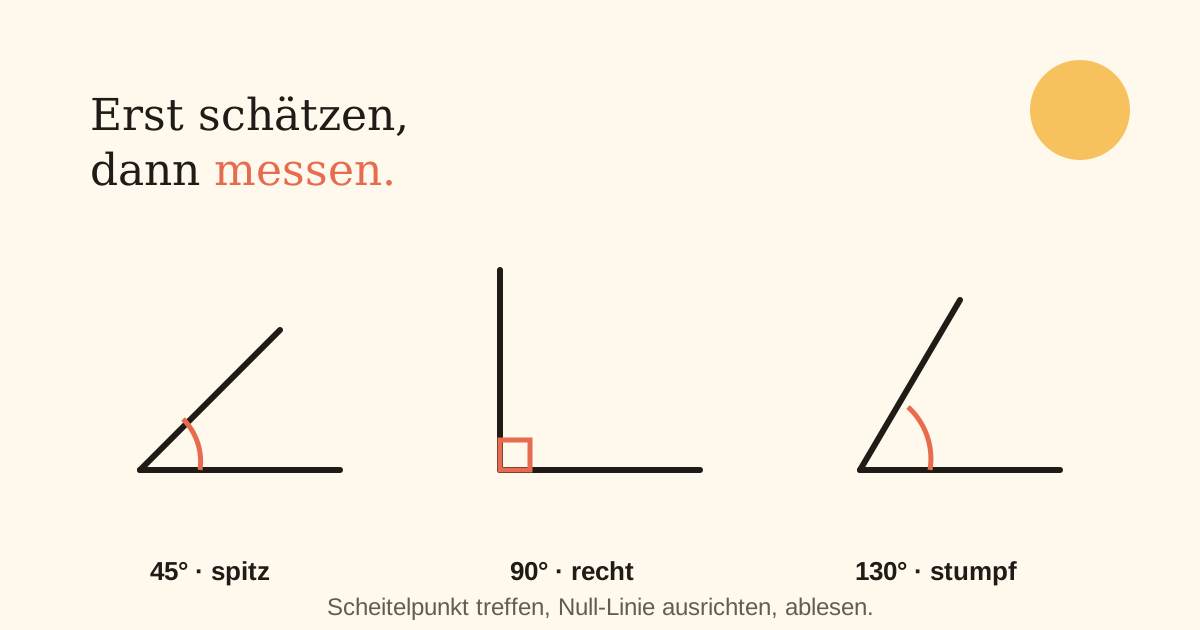
Children meet angles long before they have a name for them: the corner of a sheet of paper, the hands of a clock, the slope of a slide. In years 3 and 4, this everyday knowledge suddenly gets technical terms and a measuring tool — the protractor — and that's exactly where the child who understands the principle parts ways with the one who just reads off a number without knowing what it means.
The good news: an angle is ultimately just the opening between two lines that meet at a point. A child who can first estimate that opening by eye, before measuring it, understands the tool — instead of simply copying a number off the protractor.
The four types of angle
At primary level, it's enough to reliably tell four types of angle apart — by sight alone, no protractor needed:
- Acute angle: smaller than a right angle, the opening looks "narrow" — like the tip of a slice of cake.
- Right angle: exactly the opening of a book corner or a sheet of paper — 90 degrees, the reference point every other angle is measured against.
- Obtuse angle: bigger than a right angle, but not yet a straight line — the opening looks "wide".
- Straight angle: a fully continuous, straight line — 180 degrees, twice as much as a right angle.
Measuring correctly with a protractor
Measuring itself always follows the same three steps. First, the point where the two lines meet (the vertex) is placed exactly on the protractor's centre point. Then one of the two lines is lined up exactly with the protractor's zero-degree line. Only after that is the reading taken — where the second line crosses the degree scale is the size of the angle.
Skip or blur any one of these three steps — the vertex sits slightly off-centre, the zero line isn't quite lined up with the first line — and the result shifts by several degrees, without a child noticing that anything went wrong at all.
The most common mistake: the wrong scale
A protractor carries two degree scales at once, one increasing left to right, one increasing right to left — handy for angles drawn in different orientations, but a trap if it isn't clear which scale applies. The result: a child reads off 130 instead of 50 degrees on a visibly acute angle, simply because they landed on the wrong scale.
The most reliable safeguard: estimate first, then measure. If an angle looks acute to the naked eye, the reading has to come out under 90 — if your child reads off 130 instead, it's immediately clear the wrong scale was used, with no need for anyone to correct it from the outside.
What your child can already build on
A child who already reliably tells a square from a rectangle has long had the right angle as a fixed reference point in mind, even without using the technical term — every corner of those shapes is, after all, a right angle. And estimating before measuring is already familiar from rounding and estimating calculations: forming a rough idea of the result first, then calculating — or here, measuring — precisely.
How to practise this at home in 10 minutes
A few drills that need no worksheet:
- Hunt for angles around the house: a table corner, a book cover, a door ajar — is each one acute, right or obtuse?
- Watch the hands of an analogue clock: at which time do the hour and minute hands form a right angle, and at which a straight one?
- Fold a sheet of paper exactly in half twice — the resulting corner is a reliable, portable right angle for comparing against.
- Before every protractor measurement, have your child estimate out loud ("that looks obtuse, maybe around 120 degrees") and then compare their own estimate with the actual reading.
What Talentists does differently
Our grade 3–4 worksheets have children estimate angle types purely by sight before the protractor is even introduced, and drill the three measuring steps separately instead of presenting them as one hard-to-follow process.